


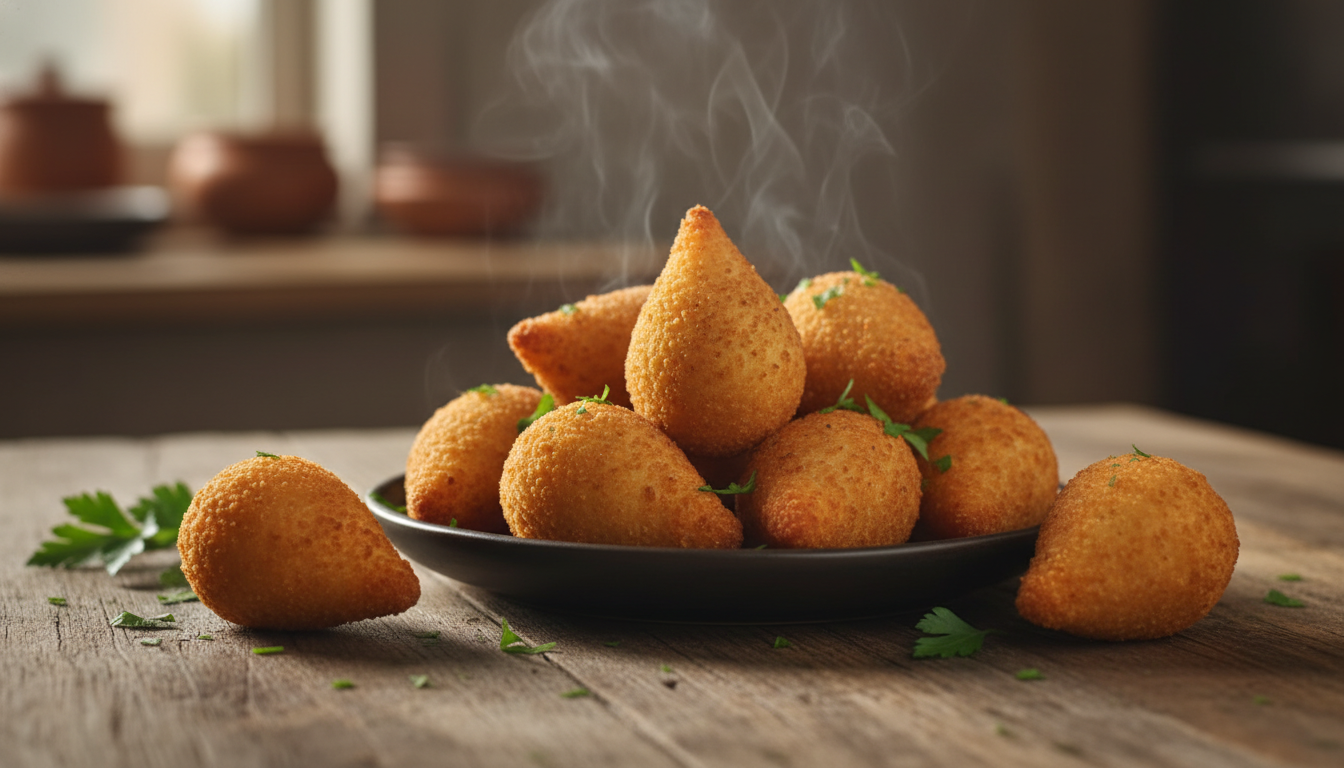
Coxinha is, without a doubt, the absolute queen of savory snack displays throughout Brazil. Present at everything from birthday parties to the simplest roadside stops, this treat has won the hearts of Brazilians with its soft dough and juicy filling. However, the traditional preparation involves deep-frying in hot oil, which often makes it a heavy and high-calorie dish. This is where the convenience of modern technology comes in to save our afternoon snack.
Preparing a Crispy and Dry Air Fryer Coxinha without using oil is perfectly possible, and the result will surprise you. The secret to preventing it from looking like “raw dough” or pale lies in the breading technique and the correct temperature of the appliance. With this recipe, you’ll have the pleasure of biting into a crust that makes a crunch, while maintaining the lightness of a food that hasn’t been conventionally fried, making it a much healthier option to offer family and friends.
Making coxinha at home is also a way to ensure the quality of the ingredients. You choose the best chicken, season it your way, and avoid preservatives. Moreover, the satisfaction of shaping your own coxinhas is therapeutic. If you thought you needed a professional deep fryer full of oil to get a quality snack, get ready to change your mind with this detailed and foolproof step-by-step guide.
Ingredients
To ensure your Crispy and Dry Air Fryer Coxinha without using oil turns out perfect, follow the measurements precisely. The balance between liquids and solids is what determines the texture of the dough.
For the Filling:
- 500g of cooked and shredded chicken breast (can be cooked in just water and salt or with seasonings of your choice).
- 1 medium onion, finely chopped.
- 2 cloves of garlic, minced.
- 2 tablespoons of tomato paste (to add color and moisture).
- 1/2 cup of creamy spreadable cheese (helps to bind and add internal creaminess).
- Chopped parsley and chives to taste.
- Salt, black pepper, and a pinch of annatto powder (colorau).
- A drizzle of olive oil for sautéing.
For the Dough:
- 2 cups (tea) of the chicken cooking broth (strained). If you don’t have enough, top it up with water or milk.
- 1 cup (tea) of whole milk (milk makes the dough softer and lighter in color).
- 2 tablespoons of butter or margarine (helps with elasticity and flavor).
- 3 cups (tea) of good-quality all-purpose flour (sifted).
- 1 teaspoon of salt (adjust according to the saltiness of the broth).
- 1 pinch of turmeric or annatto powder (optional, just to give a light color to the dough).
For Breading (The Secret to Crispiness):
- 1 cup (tea) of breadcrumbs or, preferably, Panko breadcrumbs (which ensure more crispiness in the air fryer).
- 2 eggs, beaten with a pinch of salt and a tablespoon of water.
- 1 teaspoon of sweet paprika mixed with the breadcrumbs (helps to achieve that golden tone without needing oil).
Instructions
Preparing the Crispy and Dry Air Fryer Coxinha without using oil requires patience, especially when cooking the dough. Follow each step carefully.
1. Preparing the Filling
In a pan, heat the drizzle of olive oil and sauté the onion until transparent. Add the garlic and let it brown slightly. Add the shredded chicken, tomato paste, paprika, salt, and pepper. Sauté well so the chicken absorbs all the flavors. Finally, turn off the heat, add the creamy cheese and fresh herbs. Mix well until you have a moist, but not liquid, filling. Set aside and let it cool completely before assembling.
2. Cooking the Dough
In a large, heavy-bottomed pot, combine the chicken broth, milk, butter, and salt. Bring to a medium heat and wait for it to start boiling. As soon as it boils, add all the flour at once.
Now comes the important part: lower the heat and stir vigorously with a sturdy wooden spoon. You need to cook the dough for about 5 to 8 minutes, pressing it against the sides of the pot, until it forms a smooth ball and pulls away completely from the bottom and sides. The dough needs to be well-cooked to avoid a raw flour taste.
3. Kneading the Dough
Remove the dough from the pot and place it on a clean countertop (it can be stone or stainless steel). Wait for it to cool just enough so you can touch it without getting burned. Knead the still-warm dough for a few minutes until it is perfectly smooth and elastic. Cover with plastic wrap to prevent a dry film from forming while you shape the coxinhas.
4. Shaping
Take a small portion of the dough (the size you want your coxinha to be) and roll it into a ball. With your thumb, make a hole in the center, creating a “cup” shape with walls that are not too thin or too thick. Place a spoonful of the cooled filling inside. Close the dough by pinching the edges together at the top and shape it into the characteristic teardrop form of a coxinha. Make sure no air is trapped inside the coxinha, which prevents it from bursting.
5. Strategic Breading
To get a Crispy and Dry Air Fryer Coxinha without using oil, the breading is the key differentiator. Dip each coxinha in the beaten egg mixture and then coat it in the breadcrumbs (or Panko) mixed with paprika. The paprika will help give it that golden color that the air fryer sometimes takes a while to achieve. For an even thicker and crispier crust, you can repeat the process (egg and breadcrumbs again), but once is usually enough.
6. Air Frying
Preheat your air fryer to 200°C (400°F) for about 5 minutes. Arrange the coxinhas in the basket, leaving a small space between them so the hot air can circulate on all sides. Cook at 200°C (400°F) for approximately 15 to 20 minutes. Halfway through, give the basket a light shake or carefully turn the coxinhas over so they brown evenly. The time may vary depending on the power of your air fryer brand, so keep an eye on them after the first 12 minutes. When they are golden brown and firm to the touch, they are ready!
Prep Time and Yield
- Prep time: 45 minutes (including cooking the dough and shaping).
- Cooking time (Air Fryer): 15 to 20 minutes per batch.
- Yield: Approximately 25 to 30 medium-sized coxinhas (party/snack size). The yield varies depending on the size you choose to shape them.
Tips and Variations
- Natural Touch of Color: Since there’s no deep-frying, the coxinha might take a while to brown. Mixing a little turmeric or smoked paprika into the breadcrumbs ensures an incredible fried-snack appearance, but without the use of fat.
- Potato Dough: If you prefer an even more velvety dough, you can replace one cup of all-purpose flour with one cup of cooked and mashed potato (like a very dry puree). This gives the Crispy and Dry Air Fryer Coxinha without using oil a divine internal texture.
- Healthy Option: Replace regular all-purpose flour with oat flour or whole wheat flour, and use skim milk. For breading, use flaxseed meal or almond flour for a lower-carb version.
- Filling Variation: Besides the traditional chicken, you can use shredded dried beef with pumpkin, ham and cheese, or even a vegetarian version with shimeji mushrooms or creamy palm hearts. The important thing is that the filling is always firm and doesn’t release water.
- Egg-Free Breading: If you have an egg allergy or want something simpler, you can dip the coxinhas in a mixture of water with a little cornstarch before coating them in breadcrumbs. The result is also excellent.
How to Store
Knowing how to store them correctly is essential for anyone who wants convenience in their daily life. The Crispy and Dry Air Fryer Coxinha without using oil is excellent for making in large quantities to always have on hand.
- In the Refrigerator: If you have leftover cooked coxinhas, you can store them in an airtight container for up to 3 days. To eat them again, just put them in the air fryer for 5 minutes at 180°C (350°F) to restore their crispiness. Avoid the microwave, as it will make the dough soggy and rubbery.
- In the Freezer (Uncooked): This is the best storage method. Shape the coxinhas, bread them, and place them on a baking sheet, separated from each other. Freeze until they are solid (about 2 hours). Then, transfer them to freezer-safe plastic bags. They last for up to 3 months.
- How to Cook from Frozen: No need to thaw! Take the coxinhas directly from the freezer to the preheated air fryer at 180°C (350°F). The cooking time will be a bit longer, about 25 to 30 minutes, to ensure the center heats up well without burning the outside.
Frequently Asked Questions

Does air fryer coxinha get as crispy as the deep-fried version?
Yes, as long as you use the correct breading technique. Using Panko breadcrumbs or good-quality breadcrumbs is essential. The secret is the rapidly circulating hot air, which “dries” the surface and creates the crispy layer. Although the texture is slightly different from deep-frying (which is greasier), the air fryer version is very satisfying and much lighter.
Why did my coxinha crack or burst in the air fryer?
This usually happens for two reasons: air trapped inside the coxinha during shaping or excess moisture in the filling. Make sure to press the dough firmly against the filling when closing it. Also, if the filling is too “wet” or has too much sauce, the steam will try to escape during heating, causing the dough to crack. Keep the filling creamy, but firm.
Can I use store-bought potato dough?
You can, but the homemade dough taught here has a better structure to withstand the dry heat of the air fryer. Commercial doughs are often formulated specifically for frying and may dry out too much in the hot air appliance. If you use a store-bought one, brush a little olive oil on the outside to help with the texture.
Is it necessary to brush with oil or olive oil before air frying?
It’s not mandatory for the recipe to work, but if you want a result that looks identical to one from a snack bar (very shiny and golden), you can use an olive oil spray and give just a light “spritz” over the coxinhas before turning on the appliance. This enhances the crispiness, but even without any oil, the recipe described above is delicious.
Can I make giant coxinhas with this recipe?
You can, but the cooking time will need to be adjusted. Very large coxinhas run the risk of getting golden on the outside and remaining cold in the center. For large sizes, reduce the temperature to 160°C (320°F) and cook for longer (about 30 minutes), increasing to 200°C (400°F) in the final minutes just to brown them. Medium or small sizes are ideal for the air fryer.
O BrasilN1.com é um portal especializado em receitas culinárias confiáveis, com foco na gastronomia brasileira e em preparos adaptados à rotina doméstica.
Todo o conteúdo é desenvolvido e validado pela Chef Laura Montovani, profissional dedicada à padronização de receitas, seleção criteriosa de ingredientes e testes práticos que asseguram consistência nos resultados.
Seguimos boas práticas editoriais, com atenção à precisão das informações, linguagem acessível e compromisso com originalidade, oferecendo materiais gastronômicos seguros e úteis para diferentes públicos.
